¶ Tools and Materials
-
A 2.0 mm Allen key
-
A 2.5 mm Allen key
-
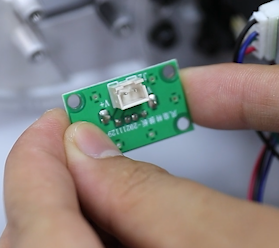
A new air purifier adapter board
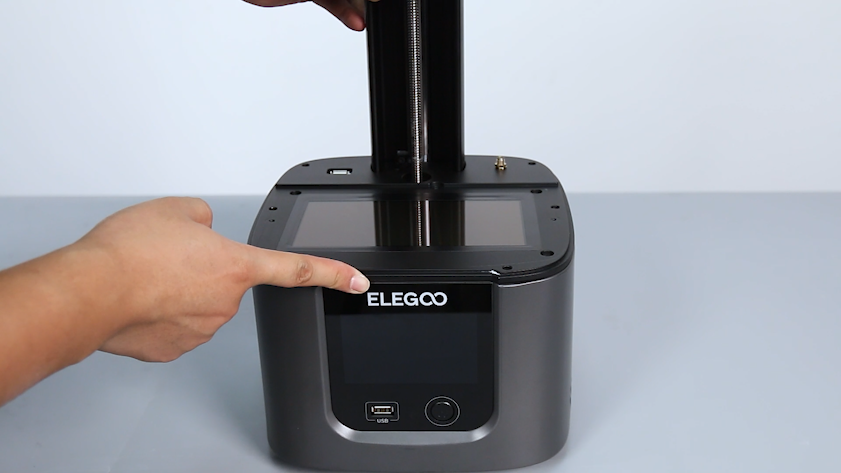
¶ Instruction
¶ Remove the old air purifier adapter board
-
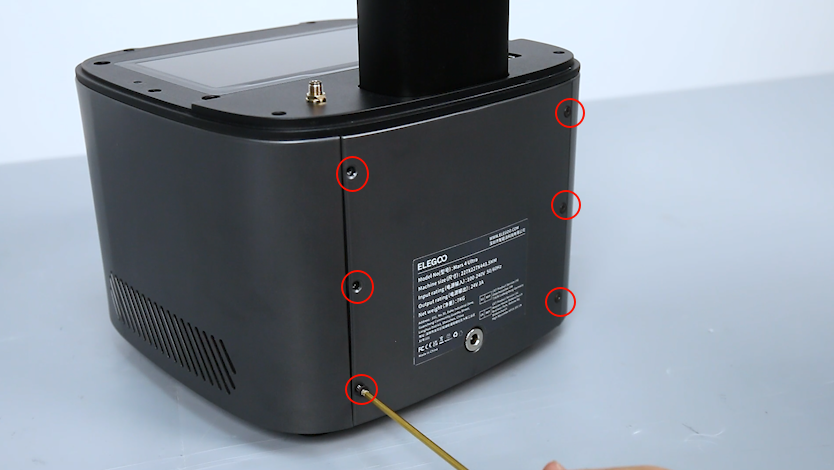
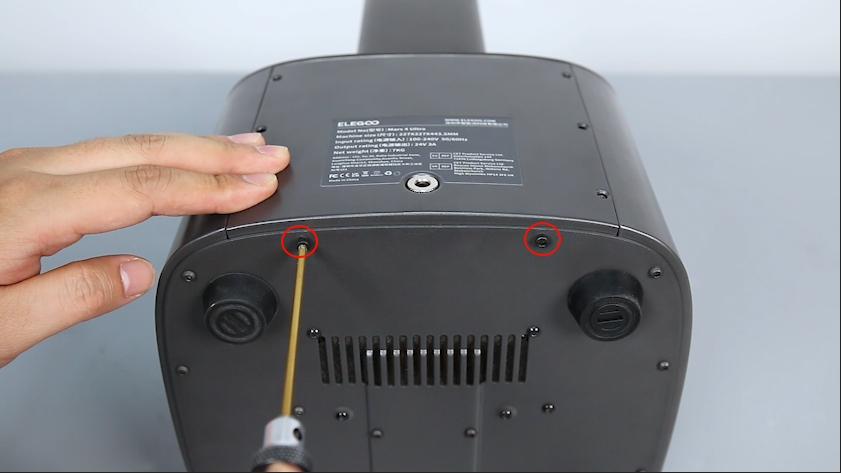
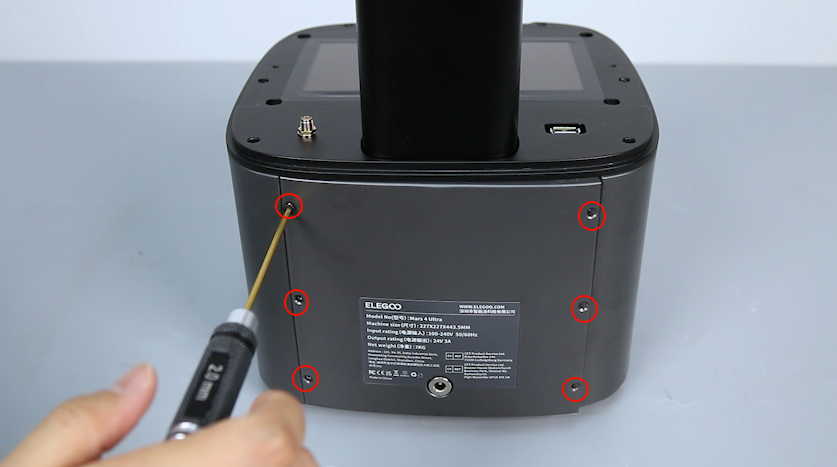
Loosen the 6 six screws securing the back cover of the printer with a 2.0 mm Allen key.
-
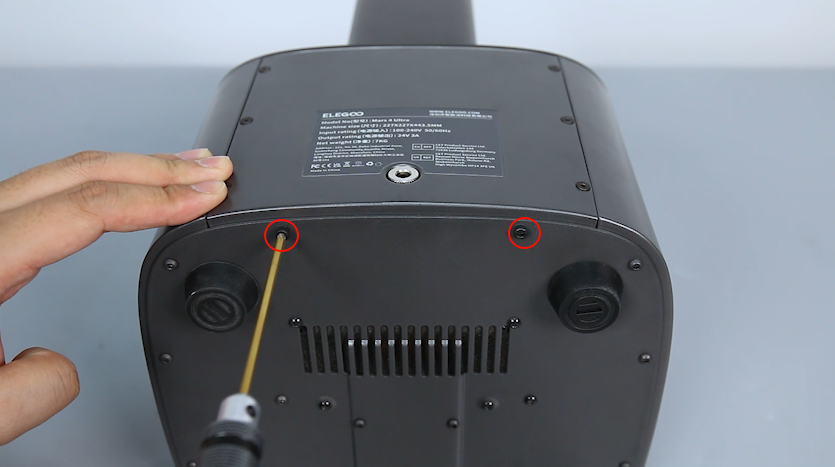
Loosen the two screws securing under the back cover of the printer with a 2.5 mm Allen key.
-
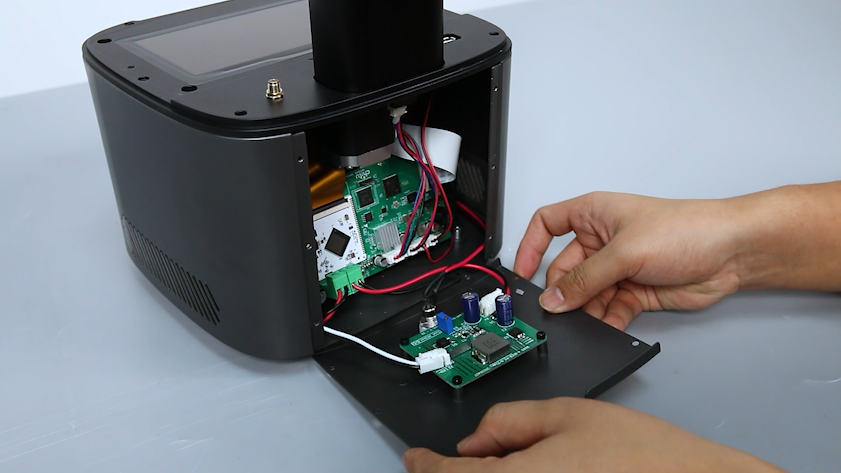
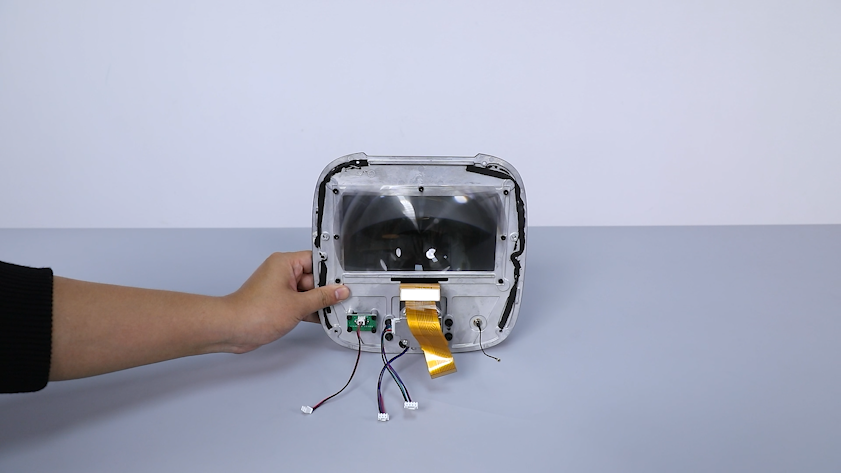
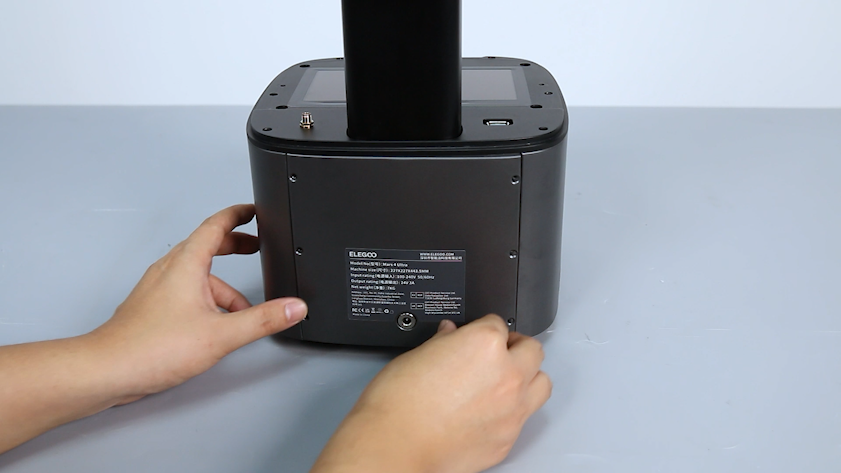
Lay the back cover flat.
Note: There are cable connections inside, remove it carefully.
-
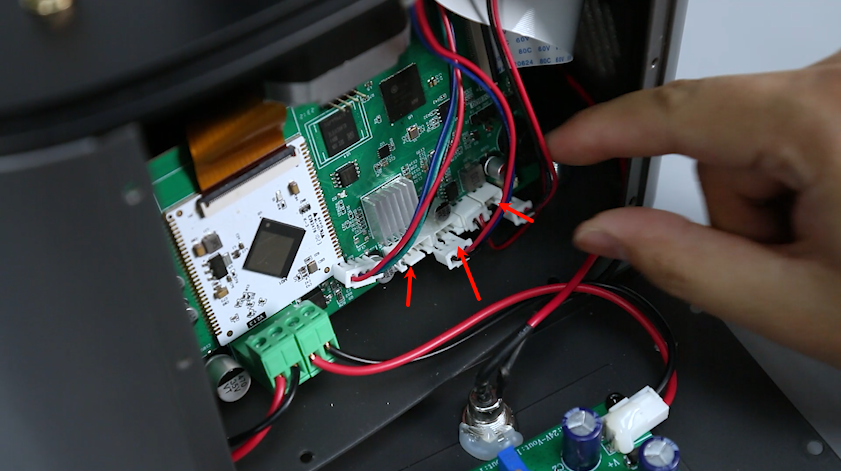
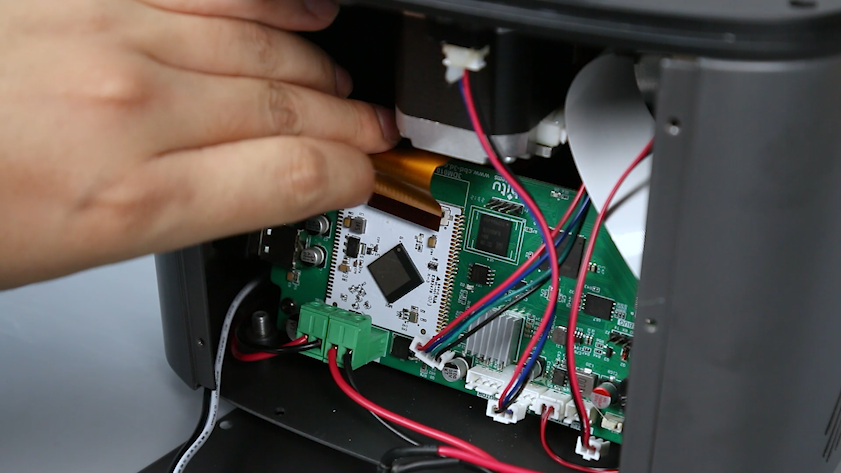
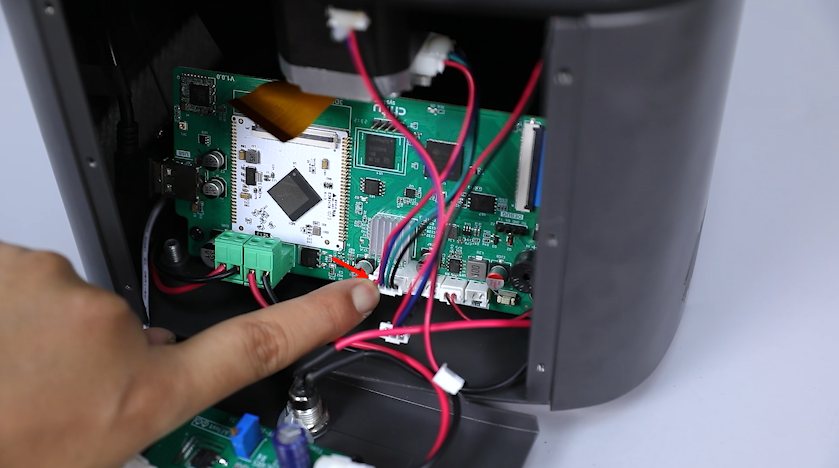
Remove the motor cable, limit switch cable, cooling fan cable, and USB port cable from the motherboard.
-
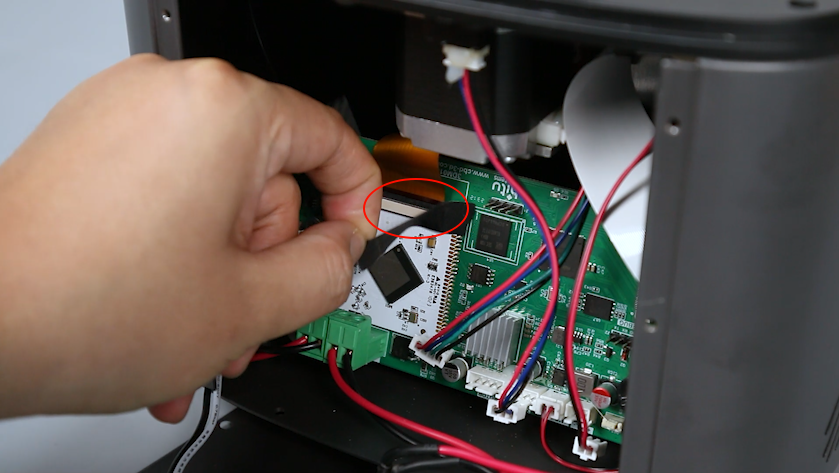
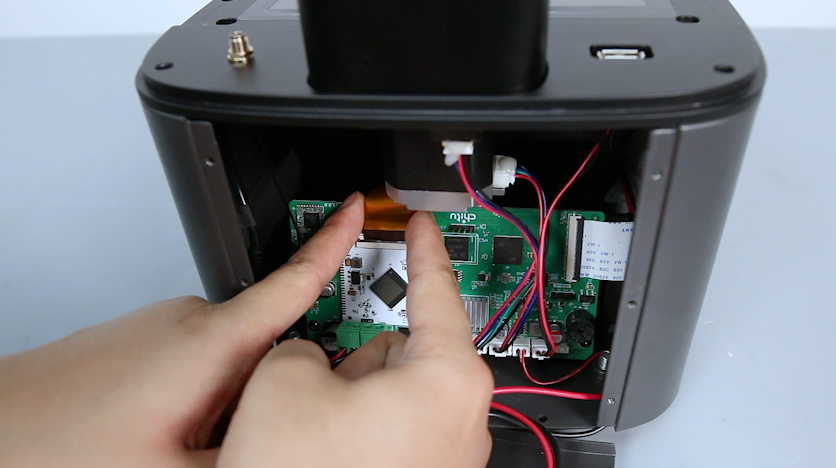
Tear off the black tape on the surface of the LCD screen port. Keep it for later use.
-
Unplug the LCD screen port cable from the motherboard.
-
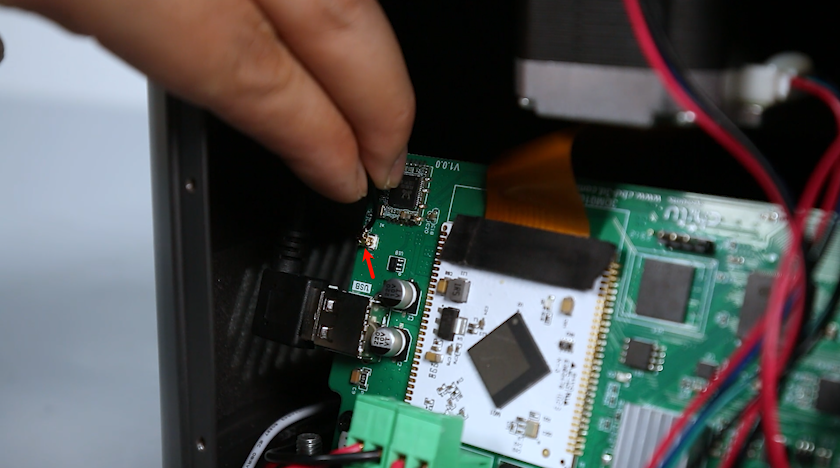
Unplug the Wi-Fi antenna from the motherboard.
-
Loosen the six screws securing the middle housing with a 2.5mm Allen key.

-
Lift up the middle housing.

-
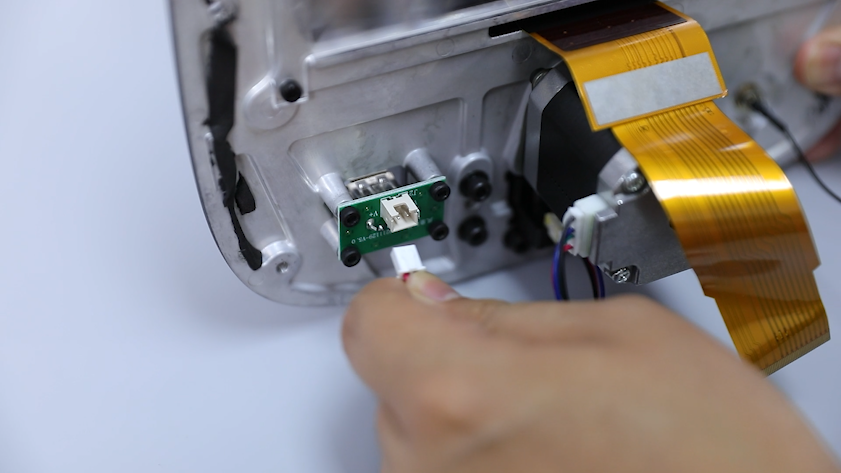
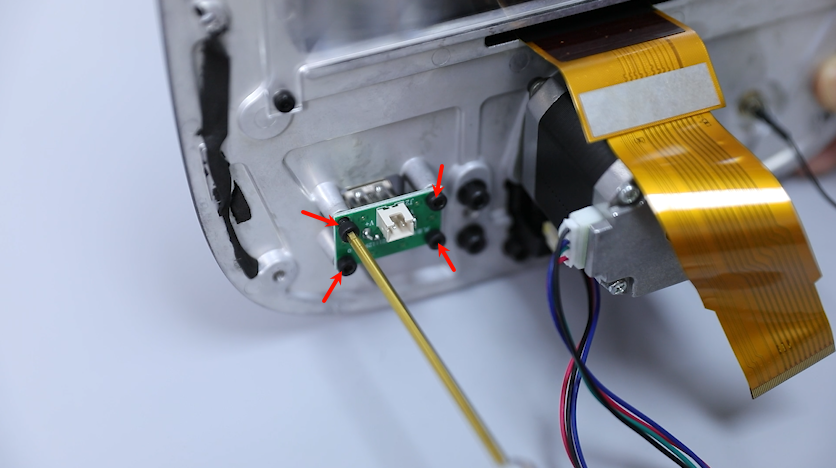
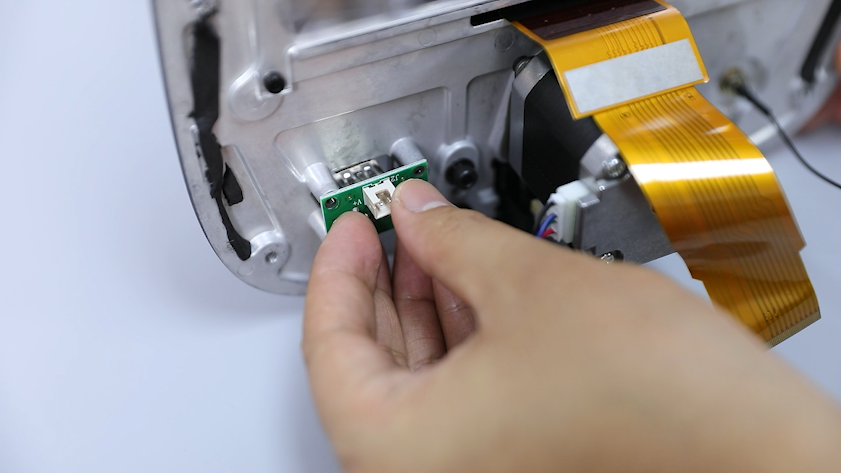
Organize the cables. Unplug the air purifier adapter board cable.
-
Loosen the four screws securing the air purifier adapter board with a 2.5mm Allen key. Remove the old air purifier adapter board.
¶ Install the new air purifier adapter board
-
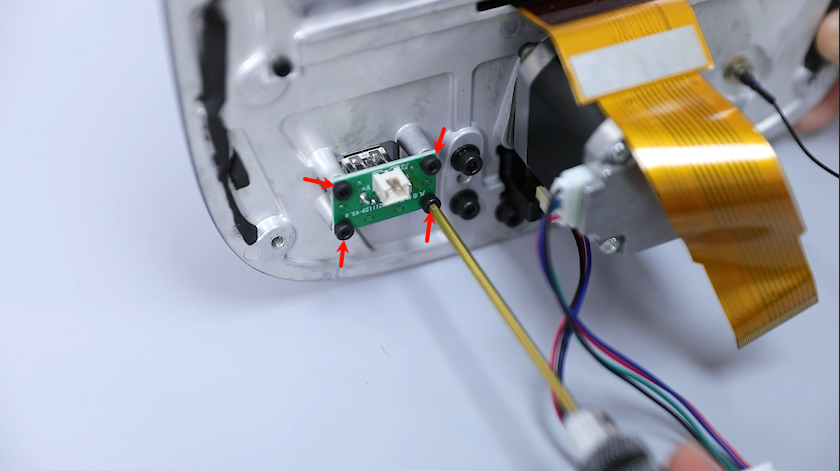
Get the new air purifier adapter board. Align the screw holes and place the air purifier adapter board into the mounting position.
Note: The side with cable port must face upwards.
-
Tighten the four screws securing the air purifier adapter board with a 2.5mm Allen key.
-
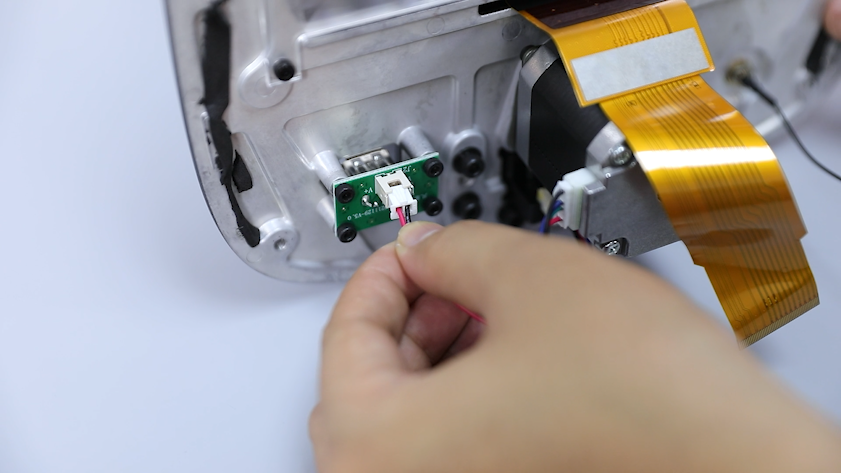
Insert the air purifier adapter board cable.
-
Align the screw holes and place the middle housing into the mounting position.
-
Organize the internal cables of the printer to avoid the cables being pressed or hidden inside. Tighten the six screws securing the middle housing with a 2.5mm Allen key.

-
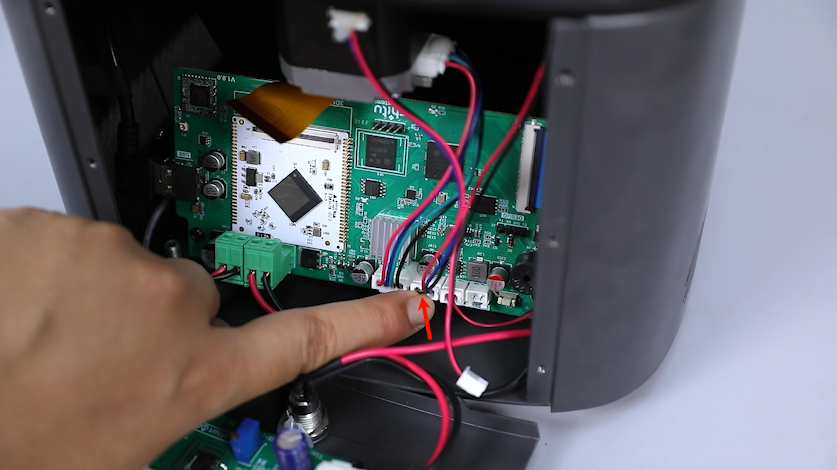
Plug in the motor cable into the Z-MOTOR port on the motherboard.
-
Plug in the limit switch cable into the Z-port on the motherboard.
-
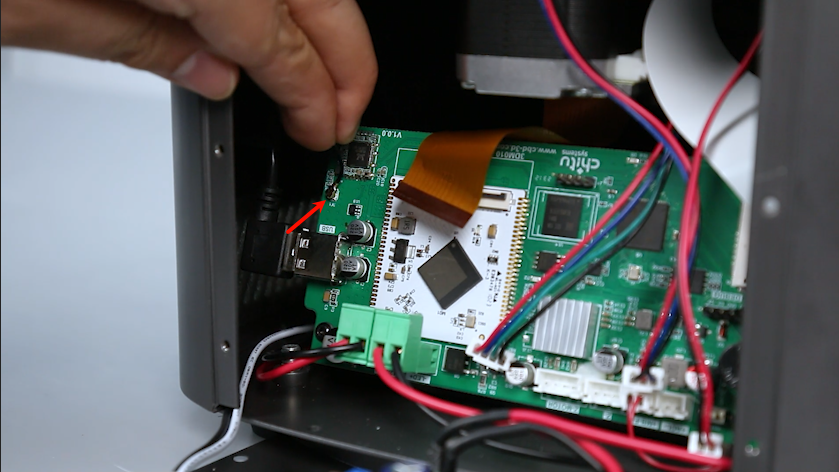
Plug in the USB port cable into the ACL port on the motherboard.

-
Plug the LCD screen ribbon cable into the motherboard port.
Note: The LCD screen cable is installed in a fixed direction.
-
Stick the black tape back to the LCD ribbon cable port.

-
Plug in the Wi-Fi antenna into the motherboard port.
-
Align the back cover with the screw holes and put the back cover into the mounting position.
-
Tighten the six screws securing the back cover of the printer with a 2.0mm Allen key.
-
Tighten the two screws securing the bottom of the back cover of the printer with a 2.5 mm Allen key.
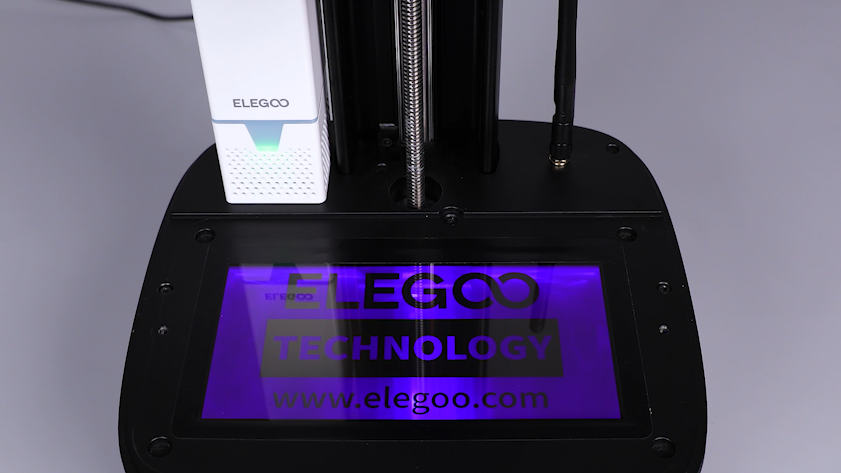
¶ Verification
-
Turn the power switch ON (symbol "|") and unplug the power supply cable.
-
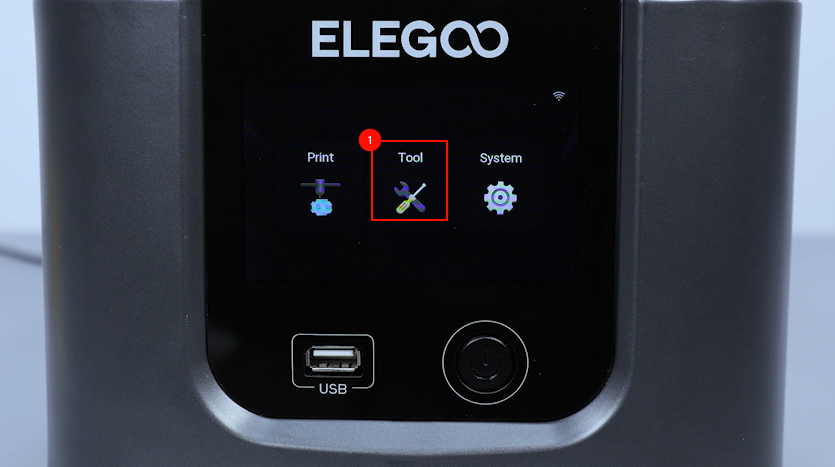
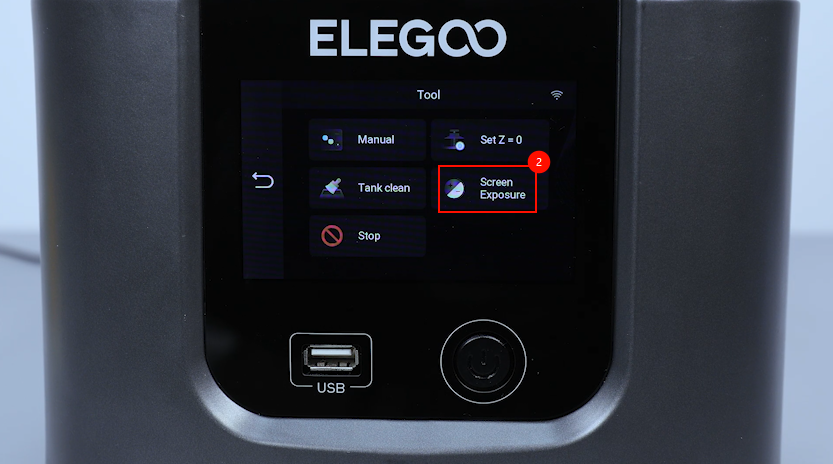
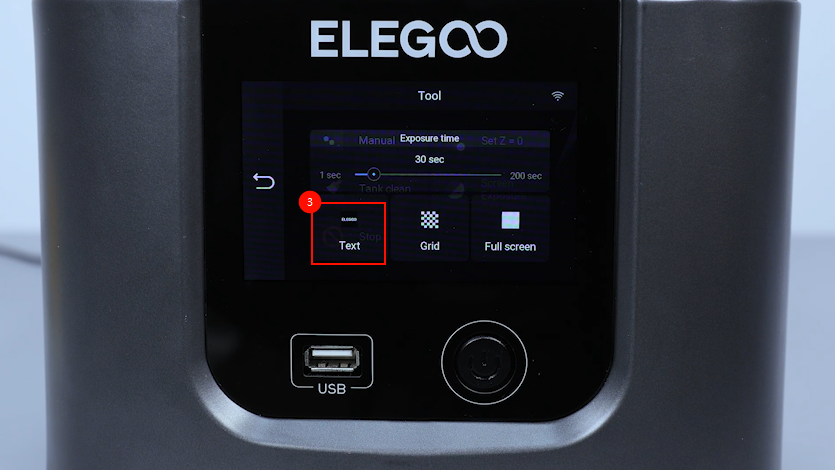
On the touch screen, select Tools - Screen Exposure - Text.
-
Confirm that the LCD screen lights up with the correct pattern and the air purifier lights up with the indicator light. The printer is ready for use.